3. Install Salesforce Extension Pack for Visual Studio Code
Open your VsCode and Click on Extensions icon on left hand side. Then Search for “Salesforce Extension Pack” and click on install button.
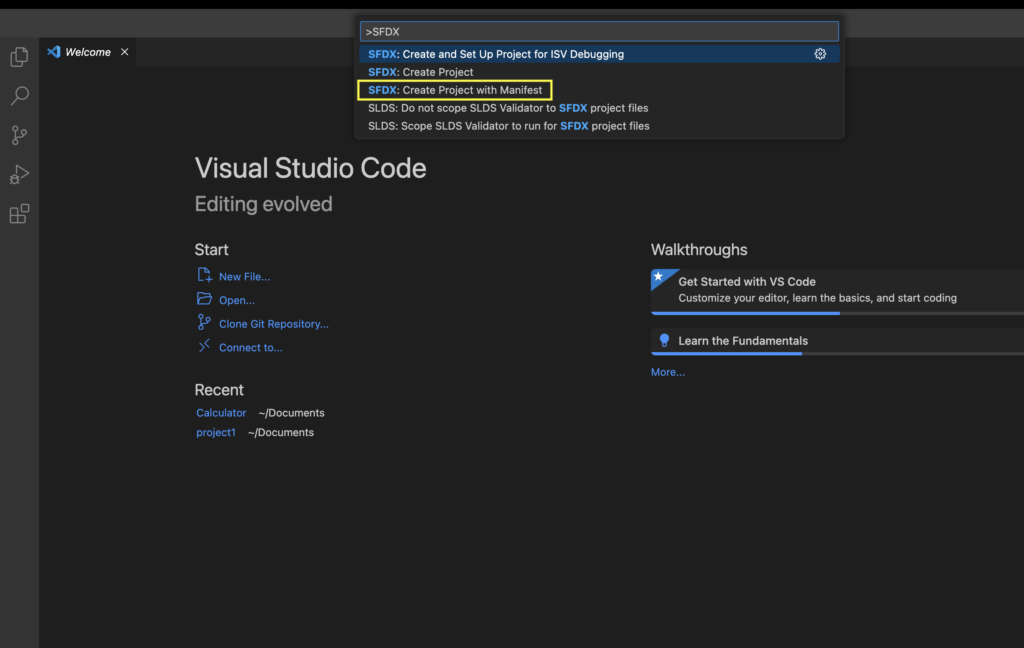
4. Create a Salesforce Project using SFDX command
To Create the project open Command Palette or press Ctrl + Shift + P for Windows or Command + Shift + P for Mac. Then type SFDX: Create Project with Manifest .
Select Standard in the next option.
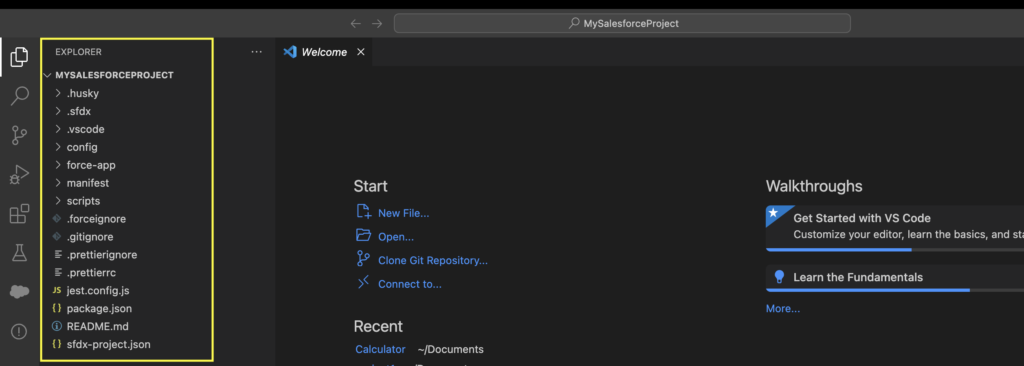
Then provide your project name and select the location where you want to save your project.
After this point you will able to see blank folder structure in VsCode. Let see how we can connect our VsCode with Salesforce.
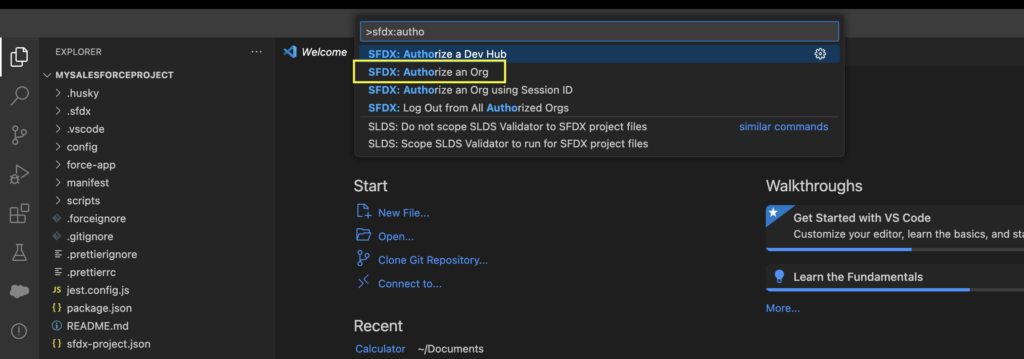
5. Connect with Salesforce Org : Authorize an Org
Open Command Palette or press Command + Shift + P. This time we need to type or Select “SFDX: Authorize an Org“.
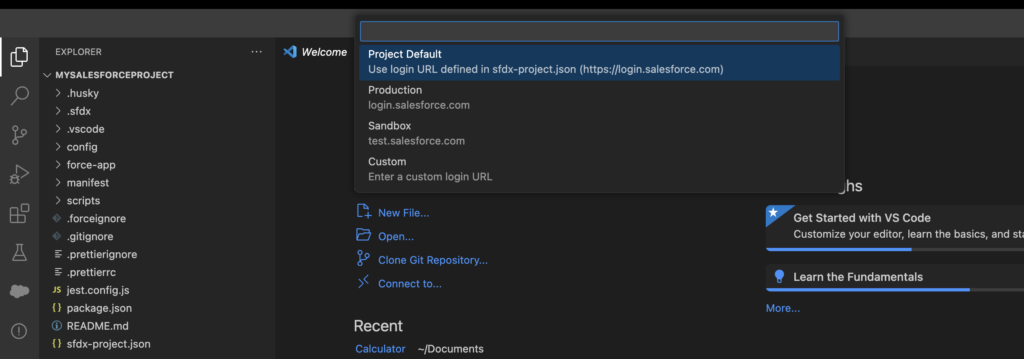
Then it will ask you which environment we need to connect to
In the last step you need to provide the org alias name. Then it will take you to your default browser and ask you for org credentials. If prompted to allow access, click Allow.
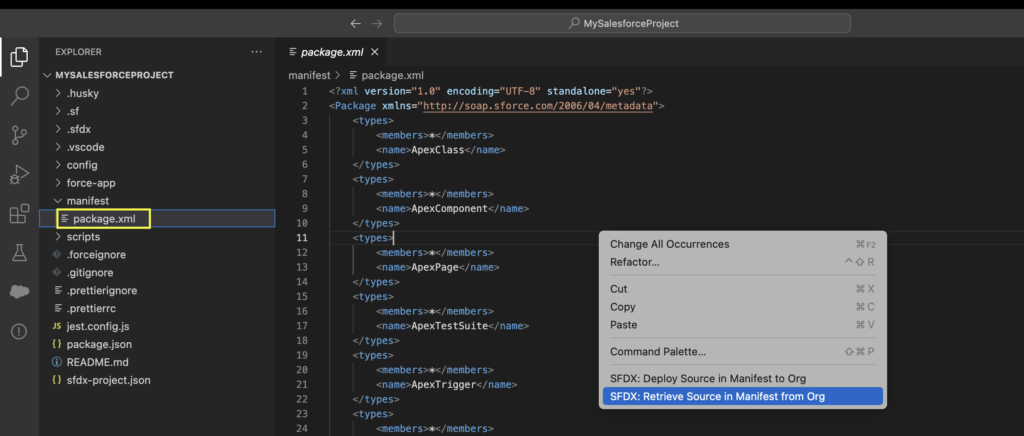
6. Retrieve Component from Salesforce Org using VsCode
Go to Manifest folder. Then Modify your Package.xml file to add and remove component. Finally Right Click on Package.xml and select “SFDX: Retrieve This Source from Org” option
It’ll retrieve all the metadata from your org which is specified in your package.xml file.
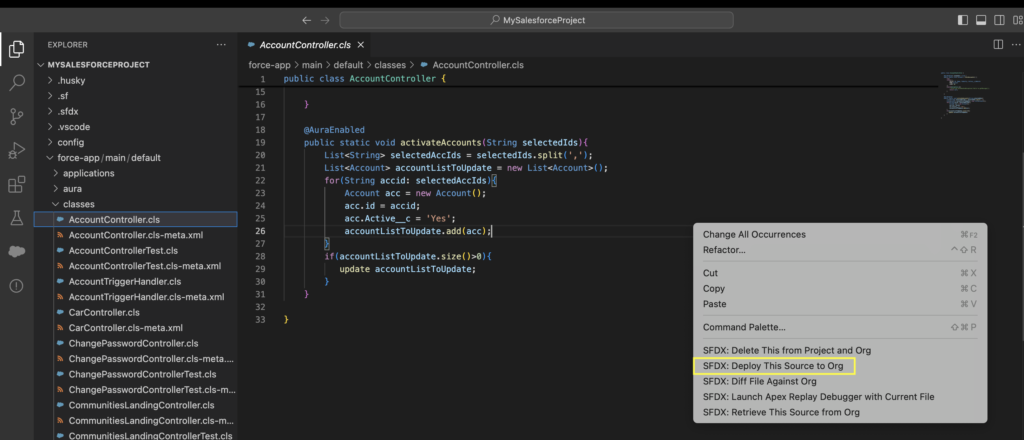
7. Deploy component using Visual Studio Code
Select the file which you want to deploy in your org. Then Right click on VsCode and select the “SFDC: Deploy This Source to Org” option for deployment.